
Welcome to the Nikon D5200 Instruction Manual, your comprehensive guide to mastering this versatile DSLR camera. This manual provides detailed instructions to help you unlock its full potential and achieve exceptional photography results.
1.1 Overview of the Nikon D5200
The Nikon D5200 is a versatile and feature-rich DSLR camera designed for both beginners and enthusiasts. It boasts a 24.1-megapixel APS-C CMOS sensor, delivering high-quality images with excellent detail and color accuracy. The camera features a vari-angle 3-inch LCD screen, making it ideal for shooting from various angles. With its compact and lightweight design, the D5200 is easy to carry, while its robust build ensures durability. It supports Full HD video recording and offers a range of shooting modes, including Manual, Auto, and Scene modes, providing flexibility for creative photography. The EXPEED 3 image processor enhances performance and image quality.
1.2 Importance of Reading the Manual
Reading the Nikon D5200 instruction manual is essential to fully understand and utilize the camera’s features. It provides detailed explanations of settings, modes, and functions, ensuring you can capture images and videos effectively. The manual helps you troubleshoot common issues and customize settings to suit your preferences. By following the guidelines, you can prevent errors, optimize performance, and enhance your photography skills. Whether you’re a beginner or an advanced user, the manual serves as a valuable resource to maximize your camera’s potential and elevate your creative output.
Key Features of the Nikon D5200
The Nikon D5200 boasts a 24.1MP CMOS sensor, advanced autofocus, and versatile shooting modes, offering exceptional image quality and creative control for photographers of all levels.
2.1 24.1 Megapixel CMOS Sensor
The Nikon D5200 features a 24.1-megapixel CMOS sensor, delivering sharp, detailed images with vibrant colors. This sensor excels in low-light conditions, capturing stunning shots with reduced noise and enhanced clarity. Its high resolution ensures that even when cropping or enlarging images, the quality remains exceptional. Whether you’re shooting landscapes or portraits, the D5200’s sensor provides the precision and detail needed for professional-grade photography. This advanced technology makes it an ideal choice for photographers seeking high performance and reliability in various lighting situations.
2.2 Autofocus System
The Nikon D5200 boasts an advanced 39-point autofocus system, offering precise and rapid subject tracking. This system ensures sharp focus, even with fast-moving subjects, making it ideal for action and wildlife photography. The D5200 also features nine cross-type sensors, enhancing accuracy and reliability in various lighting conditions. With customizable AF modes, users can tailor focus settings to their creative needs, ensuring optimal performance in diverse shooting scenarios. This robust autofocus system is a key feature that elevates the D5200’s performance, making it a versatile tool for photographers of all levels.
Getting Started with Your Nikon D5200
Unbox and familiarize yourself with the camera, lenses, and accessories. Charge the battery, insert a memory card, and power on the device to begin setup.
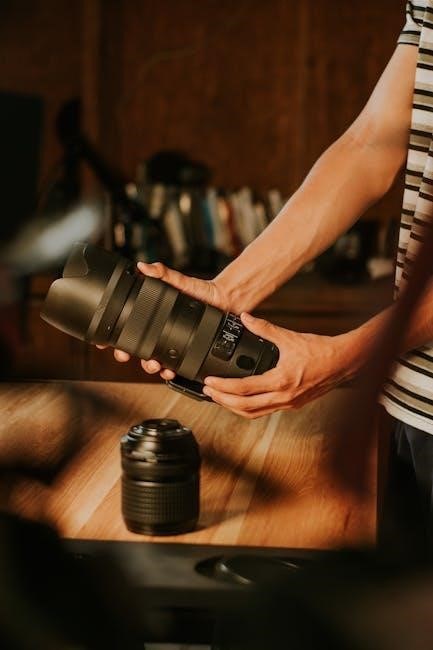
3.1 Unboxing and Initial Setup
Upon unboxing, carefully inspect the Nikon D5200, ensuring all components are included. This typically comprises the camera body, 18-55mm VR lens, EN-EL14 battery, charger, eyecup, and strap. Before initial use, charge the battery fully using the provided MH-24 charger. Insert the memory card, preferably a Class 6 or higher SD/SDHC/SDXC card, into the slot located on the camera’s right side. Power on the camera by rotating the mode dial to any position and pressing the shutter release halfway. The camera will prompt you to set the language, time zone, and date. Navigate through these settings using the multi-selector and confirm with the ‘OK’ button. Once completed, the camera is ready for first-time setup.
3.2 First-Time Camera Setup
After unboxing, insert the EN-EL14 battery into the camera’s grip, ensuring it clicks securely. Next, slide a memory card into the slot on the right side. Power on the camera by rotating the mode dial to any position and pressing the shutter release halfway. Follow the on-screen prompts to set your language, time zone, and date. Use the multi-selector to navigate and the ‘OK’ button to confirm. Set the shooting mode to ‘Auto’ for ease of use. Review the setup in the information display by pressing the ‘i’ button. Customize basic settings like autofocus mode and ISO sensitivity as needed. Your camera is now ready for use.

Understanding Shooting Modes
Explore the Nikon D5200’s shooting modes, including Auto, Scene Modes, and creative modes like P, S, A, and M. These modes offer flexibility for various photography scenarios, helping you achieve desired results with ease and control.
4.1 Auto Mode
Auto Mode is designed for simplicity, allowing the camera to automatically adjust settings for optimal results. Ideal for beginners or quick shots, it selects the best aperture, shutter speed, and ISO. The camera analyzes the scene and applies appropriate settings, ensuring vibrant colors and proper exposure. With Auto Mode, you can focus on composition while the Nikon D5200 handles technical details. It also incorporates advanced features like scene recognition and automatic low-light compensation, making it versatile for various lighting conditions. This mode is perfect for capturing spontaneous moments without manual adjustments, delivering sharp and well-balanced images effortlessly.
4.2 Manual Mode
Manual Mode offers full control over camera settings, allowing photographers to adjust ISO, aperture, and shutter speed independently. This mode is ideal for experienced users who want creative freedom. By manually setting these parameters, you can achieve precise control over exposure, depth of field, and motion capture. The Nikon D5200’s Manual Mode is particularly useful in challenging lighting conditions or for specific artistic effects. It also supports RAW image capture, enabling post-processing flexibility. With Manual Mode, you can explore advanced techniques and unlock the camera’s full potential for professional-grade photography.

Navigating the Menu System
The Nikon D5200 menu system provides easy access to settings and customization options. Use the multi-selector to navigate through menus and adjust settings efficiently.
5.1 Menu Overview
The Nikon D5200 menu system is intuitive and comprehensive, offering easy access to various camera settings. The menu is divided into categories such as Shooting, Setup, Retouch, and My Menu. Each category contains specific options for customizing camera functions. The Shooting menu allows adjustments for image quality, white balance, and ISO sensitivity. The Setup menu handles general camera settings like time, language, and firmware updates. Retouch options enable in-camera editing, while My Menu lets you save frequently used settings for quick access. Navigating the menu is straightforward using the multi-selector and OK button, making it user-friendly for photographers of all levels.
5.2 Customizing Settings
The Nikon D5200 allows extensive customization to tailor camera behavior to your preferences. You can create a personalized shooting experience by adjusting settings like autofocus modes, metering patterns, and flash control. The camera also supports customizing button assignments, enabling quick access to frequently used functions. Additionally, you can save up to 20 settings in the My Menu feature for rapid retrieval. Customization options include modifying shooting modes, adjusting image processing parameters, and setting up user-defined presets for specific photography scenarios. These features empower photographers to streamline their workflow and optimize the camera for their unique needs.
Advanced Features and Settings
Explore advanced features like ISO sensitivity, white balance, and flash customization to refine your photography. These settings offer precise control over image capture and enhancement. Use them wisely to elevate your results and achieve professional-quality photos. Experiment with manual adjustments to tailor the camera to your creative vision and capture stunning images in various lighting conditions. Mastering these features will unlock the full potential of your Nikon D5200. Optimize your workflow and enhance your storytelling through photography with these powerful tools.
6.1 ISO Sensitivity
ISO sensitivity is a critical setting that controls the Nikon D5200’s light-capturing ability. The camera offers an ISO range of 100 to 6400, extendable to 25600 in high-sensitivity mode. Lower ISO values (e.g., 100-400) are ideal for bright lighting conditions, delivering sharp, noise-free images. Higher ISOs (e.g., 6400-25600) are better suited for low-light scenarios but may introduce grain or digital noise. Adjust ISO via the camera’s menu or by using the dedicated ISO button for quick access. Balancing ISO with aperture and shutter speed ensures optimal results in various lighting environments. Use lower ISOs for cleaner images and higher ISOs when light is scarce, but monitor noise levels to maintain quality. Experimenting with ISO settings helps refine your photography skills and adapt to diverse shooting conditions effectively.
6.2 White Balance
White balance ensures accurate color representation in your photos by adjusting for different light sources. The Nikon D5200 offers multiple presets, including Auto, Daylight, Fluorescent, Incandescent, and more, to match various lighting conditions. For precise control, use the manual white balance setting, which allows you to measure and set a custom value. This is particularly useful in mixed lighting or when using external light sources. Correct white balance ensures natural-looking colors, preventing unwanted hues like yellowish tones under incandescent light or bluish casts in shade. Experiment with different settings to achieve the desired color accuracy and enhance your photography results effectively.
6.3 Flash Customization
The Nikon D5200 allows for extensive flash customization to suit your photography needs. You can adjust the flash sync speed, with options like 1/320s (Auto FP) or 1/250s (Auto FP), ensuring proper synchronization. Manual flash power adjustment is also available, enabling precise control over light output. Additionally, the camera supports rear-curtain sync for creative effects and flash exposure compensation for fine-tuning brightness. For advanced users, the D5200 is compatible with Nikon’s external Speedlight system, offering even greater control and flexibility in various lighting scenarios. These features make the D5200 versatile for both casual and professional photography applications.
Video Recording Capabilities
The Nikon D5200 offers advanced video recording features, including Full HD (1080p) resolution and frame rates up to 60fps. Manual movie settings provide precise control over exposure, ISO, and aperture for professional-quality results. The camera also supports stereo sound recording and external microphone input, enhancing audio quality. With these capabilities, the D5200 is ideal for capturing dynamic and high-definition video content, making it a versatile tool for both photographers and videographers.
7.1 Manual Movie Settings
Manual Movie Settings on the Nikon D5200 empower filmmakers to customize video capture precisely. By enabling manual control, users can adjust aperture, shutter speed, and ISO sensitivity to suit their creative vision. This feature allows for fine-tuning exposure, ensuring optimal lighting and depth of field in every frame. Additionally, the camera supports manual focusing during recording, providing greater control over subject emphasis. These settings are accessed via the shooting menu, where users can also select frame rates and resolution up to 1080p at 60fps, ensuring high-quality video output tailored to specific needs;
Customizing Your Camera
The Nikon D5200 offers extensive customization options to tailor the camera to your preferences. Users can assign frequently used functions to specific buttons for quick access. Custom settings allow you to save personalized shooting styles, ensuring consistent results. The camera also supports customizing the menu system, letting you prioritize frequently used options. Additionally, external controls can be configured to streamline your workflow. These features enhance usability, making the D5200 adaptable to individual photographic needs and shooting styles. By personalizing your camera, you can optimize efficiency and creativity in every session.

Troubleshooting Common Issues
This section addresses common issues like error messages and camera malfunctions. Refer to the troubleshooting guide for quick solutions to restore your camera’s optimal performance.
9.1 Error Messages
Understanding error messages is crucial for resolving issues quickly. Common errors include ” Err” or “FORN” displayed on the LCD. These indicate problems like memory card issues, lens malfunctions, or firmware errors. Refer to the troubleshooting section for solutions. Always power off the camera before attempting repairs. If unresolved, consult Nikon support for professional assistance. Regular updates and proper maintenance can prevent many errors. Ensure your camera is running the latest firmware for optimal performance.

Maintenance and Care
Regular cleaning and proper storage are essential for maintaining your Nikon D5200. Use a dry cloth for exterior cleaning and avoid harsh chemicals. Store the camera in a cool, dry place to prevent damage. Check for firmware updates regularly to ensure optimal performance and address any potential issues promptly.
10.1 Cleaning the Camera
Cleaning your Nikon D5200 is crucial for maintaining its performance. Start by using a microfiber cloth to gently wipe the exterior, paying attention to the lens and viewfinder. For the sensor, use a blower to remove dust, avoiding any liquids. Nikon recommends specialized cleaning solutions for the lens and viewfinder to prevent damage. Clean the camera regularly, but avoid over-cleaning. Store it in a dry, cool place away from direct sunlight. Refer to Nikon’s maintenance guide for detailed instructions and ensure you use the right materials to protect your camera effectively.
With this comprehensive guide, you are now equipped to maximize the potential of your Nikon D5200. From understanding its features to mastering advanced settings, this manual has provided detailed insights to enhance your photography journey. Regular maintenance and practice will ensure optimal performance. Explore various shooting modes, experiment with manual controls, and capture life’s moments with precision. Refer to this manual whenever needed, and enjoy the creative freedom your Nikon D5200 offers. Happy shooting!