
Clover Pom Pom Makers offer a streamlined crafting experience, simplifying the creation of fluffy embellishments for hats, scarves, and various projects.
These tools are praised for their durability and ease of use, making pom-pom making accessible to crafters of all skill levels, as demonstrated in many tutorials.
Ashley, from The Loopy Lamb, highlights the joy of quick projects like pom-poms, perfectly suited for adding a playful touch to handmade items.
The Clover brand stands out for its robust plastic construction, lasting for years and handling hundreds of pom-poms without breaking, unlike cheaper alternatives.
With a Clover Pom Pom Maker, you can easily create consistent, professional-looking pom-poms, enhancing your crafting endeavors with delightful textures.
What is a Clover Pom Pom Maker?
The Clover Pom Pom Maker is a cleverly designed plastic tool specifically engineered to simplify the traditionally fiddly process of creating pom-poms. Unlike older methods relying on cardboard circles, these makers consist of two hinged arms that open and close, providing a consistent and efficient framework for yarn wrapping.
Available in a range of sizes, Clover Pom Pom Makers allow crafters to produce pom-poms of varying diameters, suitable for diverse projects. The tool’s design ensures even yarn distribution, resulting in full, uniform pom-poms. Many tutorials demonstrate how easy it is to use, even for beginners.
These makers are lauded for their durability; users report years of consistent use without breakage, a significant advantage over less robust alternatives. The Clover brand has become synonymous with quality in pom-pom creation, offering a reliable and user-friendly experience.
Why Choose a Clover Pom Pom Maker?
Choosing a Clover Pom Pom Maker means investing in a tool renowned for its longevity and consistent results. Unlike cheaper, flimsier alternatives, Clover makers are crafted from durable plastic, capable of withstanding hundreds of pom-pom creations without breaking down. This durability translates to long-term value for crafters.
The ease of use is another significant benefit. Numerous tutorials highlight how quickly and effortlessly beautiful pom-poms can be made, even for beginners. The consistent shape and fullness achieved with a Clover maker surpass those often obtained through traditional cardboard methods.
Furthermore, the availability of various sizes allows for project versatility. From tiny embellishments to large, statement pom-poms, Clover caters to diverse crafting needs. The brand’s reputation for quality ensures a satisfying and reliable crafting experience.

Supplies Needed
To begin crafting delightful pom-poms, gather essential supplies: yarn of any weight, a Clover Pom Pom Maker, and a sharp pair of small scissors.
Crochet thread is also recommended for securing the center, ensuring your fluffy creations remain intact and beautifully finished.
Yarn Selection
Clover Pom Pom Makers are wonderfully versatile, accommodating a wide range of yarn weights and textures! From chunky chenille to delicate fingering yarn, the possibilities are truly endless.
Lion Brand Vanna’s Choice is frequently showcased in tutorials as an excellent starting point, offering a readily available and affordable option for beginners.
However, don’t limit yourself! Experiment with different fiber compositions – wool, acrylic, cotton blends – to achieve unique looks and feels for your pom-poms.
Consider the project’s intended use when selecting yarn. For items like hats and scarves, choose a yarn that is soft and comfortable against the skin.
For decorative pom-poms, you can explore more textured or novelty yarns to add visual interest. Remember, the yarn’s weight will influence the pom-pom’s density and size!
Clover Pom Pom Maker Sizes
Clover Pom Pom Makers are available in a delightful array of sizes, allowing you to create pom-poms to suit any project! The most common sizes cater to a broad spectrum of needs, from tiny embellishments to substantial statement pieces.
You’ll typically find makers ranging from 35mm (1 3/8 inches) up to 80mm (3 1/8 inches) in diameter, providing a graduated scale for varying pom-pom dimensions.
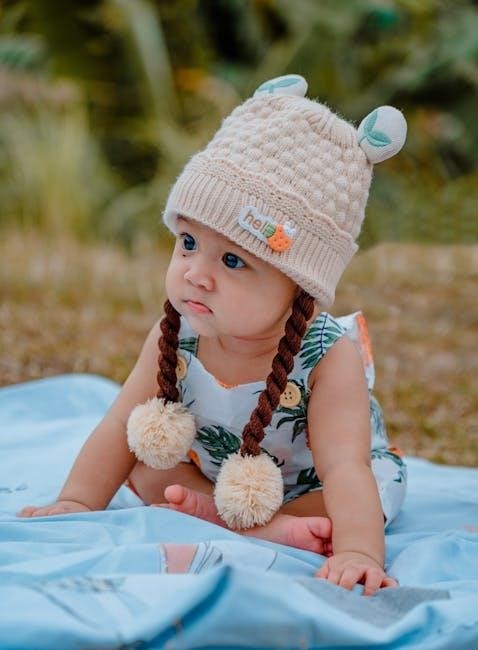
Smaller sizes are ideal for delicate accents on baby clothes or intricate accessories, while larger sizes are perfect for topping hats or creating eye-catching decorations.
Consider purchasing a set containing multiple sizes to maximize your creative options and avoid needing to buy individual makers.
Experimenting with different sizes within a single project can also add visual depth and interest – a fun technique to explore!
Essential Tools: Scissors & Thread
Beyond the Clover Pom Pom Maker itself, two crucial tools will elevate your pom-pom making: sharp scissors and sturdy thread. A small, precise pair of scissors is vital for cleanly cutting the yarn loops after wrapping, ensuring a neat and fluffy finish.
Don’t underestimate the importance of thread! While the maker secures the initial tie, reinforcing with crochet thread is highly recommended for long-lasting pom-poms.
Crochet thread offers superior strength compared to standard sewing thread, preventing unraveling and ensuring your creations withstand wear and tear.
A sewing needle facilitates weaving the thread securely through the center of the pom-pom, creating a robust core.
These seemingly simple additions are key to achieving professional-quality results and enjoying your handmade pom-poms for years to come!

Step-by-Step Instructions: Basic Pom Pom Creation
Begin by opening the Clover Pom Pom Maker, then generously wrap yarn around both arms until fully covered, exceeding initial estimations.
Securely close the arms and use sharp scissors to cut the yarn along the central groove, preparing for the final tie;
This foundational process, detailed in various tutorials, sets the stage for crafting delightful, fluffy pom-poms with ease and precision.
Opening the Clover Pom Pom Maker
Clover Pom Pom Makers typically consist of two arms connected by a hinge, allowing them to open and close easily. To begin, locate the clasp or hinge mechanism that secures the two arms together.
Gently release this clasp, separating the arms to create a U-shaped opening. The extent to which the maker opens will depend on the desired pom-pom size; larger pom-poms require a wider opening.
Ensure both arms are fully extended and stable before proceeding to the yarn-wrapping stage. This initial step is crucial for achieving a well-formed and evenly distributed pom-pom.
Familiarize yourself with the groove running along the center of each arm, as this is where you’ll eventually cut the yarn to tie the pom-pom together. A smooth opening ensures even yarn distribution.
Wrapping the Yarn
With the Clover Pom Pom Maker open, begin wrapping the yarn around both arms simultaneously. Start by securing the yarn end between the arms, ensuring it doesn’t slip during the wrapping process.
Wrap the yarn continuously and evenly, covering the entire length of both arms. It’s recommended to wind significantly more yarn than initially anticipated – two to three times the estimated amount is ideal.
This generous wrapping ensures a full and fluffy pom-pom. Maintain consistent tension as you wrap, avoiding overly tight or loose wraps, which can affect the final shape.
Continue wrapping until the arms are densely covered with yarn, creating a substantial bundle. The more yarn used, the denser and more luxurious the finished pom-pom will be.
Securing the Yarn
Once the arms of the Clover Pom Pom Maker are fully wrapped with yarn, it’s crucial to secure the end to prevent unraveling. Cut a length of crochet thread – this provides superior strength compared to yarn for tying.
Thread the crochet thread through a yarn needle. Carefully wrap the crochet thread tightly around the center of the yarn bundle, between the two arms of the maker.
Tie the crochet thread securely with a double knot, ensuring it’s snug and won’t loosen. This initial tie is vital for holding the pom-pom together during the cutting phase.
Repeat this process, wrapping and tying the crochet thread multiple times around the center for added reinforcement. The goal is to create a robust core that will withstand the subsequent steps.
Finishing Your Pom Pom
Finishing involves carefully cutting the yarn, tying the center securely with crochet thread, and tightening to form a fluffy, well-defined pom-pom shape.
Weaving a sewing needle with regular thread through the center further reinforces the tie, creating a durable and long-lasting embellishment.
Finally, trim any stray strands to achieve the desired pom-pom form, resulting in a polished and professional-looking craft element.

Cutting the Yarn
Cutting the yarn is a crucial step in finalizing your pom-pom, requiring a sharp, small pair of scissors for precision. After securing the yarn around the Clover Pom Pom Maker, carefully insert the scissor blades between the two halves of the maker.
Begin cutting along the outer groove, working your way around the entire circumference. Ensure you cut through all the wrapped yarn strands evenly; this is key to a uniform pom-pom shape. Take your time and avoid rushing this process, as neat cuts contribute significantly to the final appearance.
Once you’ve completed cutting around the maker, gently open the halves and release the cut yarn. Don’t worry if it appears a little messy at this stage – the next steps will refine the shape and create a beautifully fluffy pom-pom!
Remember to use caution when handling scissors.
Tying the Center
Tying the center of the pom-pom is vital for holding its shape and preventing it from falling apart. A strong, durable thread is recommended – many crafters prefer using crochet thread for this purpose, as it offers superior strength and security.
Cut a generous length of crochet thread (approximately 12-18 inches) and carefully thread it through the center groove of the Clover Pom Pom Maker, between the two halves. Bring the ends of the thread together and tie a very tight knot.
Pull the knot firmly to cinch the yarn strands together. This initial knot forms the core of your pom-pom. Don’t be afraid to double or triple knot it to ensure maximum security, as this step is crucial for longevity.
This secure tie will prevent unraveling.
Tightening and Securing the Tie
After tying the initial knot, further reinforcement is key to a long-lasting pom-pom. Take a sewing needle and thread it with regular sewing thread. Begin weaving the needle in and out through the center of the tied yarn strands, effectively binding them together.
This weaving process creates a robust core, distributing the tension and preventing individual yarn strands from loosening. Make several passes, ensuring you cover the entire central area. Knots can be added within the weaving for extra security, though they’ll be hidden inside the finished pom-pom.
Continue weaving and knotting until you feel confident that the center is firmly secured; This meticulous step significantly reduces the risk of the pom-pom falling apart, even with frequent use or washing.
A well-secured center is a happy center!
Advanced Techniques & Tips
Explore creativity with multi-colored pom-poms, dense designs, and crochet thread reinforcement for extra durability. Chain loop pom-poms offer a unique texture.
Adding button loops allows for interchangeable pom-poms on hats, enhancing functionality and personalization for easy washing and style changes.
Creating Multi-Colored Pom Poms
Creating vibrant, multi-colored pom-poms with a Clover Pom Pom Maker is surprisingly simple and adds a delightful visual element to your projects! Begin by selecting your desired yarn colors – consider complementary shades or bold contrasts for maximum impact.
Instead of completing one color before moving to the next, alternate yarn colors with each wrap around the maker. For example, wrap with blue, then red, then blue again, and so on. The key is consistency; maintain a relatively even distribution of colors throughout the wrapping process.
Don’t be afraid to experiment with gradients or stripes! You can gradually introduce new colors or create defined bands of color. Remember that the final result will be a blended effect, so plan accordingly. Once wrapped, proceed with the standard steps of cutting and tying to reveal your colorful creation!
Making Dense Pom Poms
Achieving a wonderfully dense pom-pom with your Clover Pom Pom Maker requires a simple adjustment to your wrapping technique. The secret lies in maximizing the amount of yarn used – wind significantly more yarn than you initially think is necessary, even two or three times what your winder suggests!
Pack the yarn tightly as you wrap around the maker arms, ensuring there are no gaps or loose spaces. This compression is crucial for creating a full, firm pom-pom. Don’t underestimate the power of a generous yarn quantity; it truly makes a difference in the final density.
After securing and cutting, the resulting pom-pom will be noticeably thicker and more substantial. This technique is ideal for projects where a robust, well-defined pom-pom is desired, offering a luxurious texture and visual weight.
Using Crochet Thread for Extra Security
To guarantee your pom-pom remains beautifully intact, especially with frequent use or washing, reinforce the center tie with crochet thread. This provides a significantly stronger hold than standard yarn alone.
After initially tying the pom-pom together with yarn, take a sewing needle and thread it with crochet thread. Weave the crochet thread repeatedly in and out through the center of the pom-pom, creating a secure binding.
Knot the crochet thread periodically as you weave, further solidifying the connection. These knots will be hidden within the pom-pom’s core and won’t affect the finished appearance. This method has proven remarkably effective, preventing pom-poms from falling apart, even with extensive handling.

Troubleshooting Common Issues
If your pom-pom unravels, reinforce the center with crochet thread and additional weaving. For uneven shapes, carefully trim the strands to achieve symmetry.
Consistent yarn wrapping and secure tying are key to preventing issues, ensuring a fluffy and well-formed pom-pom every time.
Pom Pom Falls Apart: Reinforcement Methods
A common frustration is a pom-pom that begins to unravel, despite careful creation. Fortunately, several reinforcement methods can dramatically improve durability. The most effective technique involves utilizing crochet thread for the initial tie. This stronger thread provides a more secure foundation than standard yarn.
However, don’t stop there! After tying with crochet thread, take a sewing needle and regular sewing thread. Weave this thread repeatedly in and out through the center of the pom-pom, creating a dense network of support. Knots can be added within the center – they won’t be visible but will further enhance security.
This double-layered approach—crochet thread tie and woven sewing thread—creates a robust core, preventing strands from easily pulling loose. Following these steps consistently will minimize the risk of pom-poms falling apart, ensuring your creations last.
Uneven Pom Pom Shape: Trimming Techniques
Achieving a perfectly round pom-pom often requires a little post-creation finesse. Even with careful yarn wrapping, slight irregularities can occur. The key to correcting an uneven shape lies in strategic trimming. Begin by gently fluffing the pom-pom to reveal any areas that appear sparse or elongated.
Using a sharp pair of small scissors, carefully trim away any excessively long strands. Work in small increments, rotating the pom-pom frequently to assess the shape from all angles. Avoid cutting too much at once; it’s easier to remove more yarn than to reattach it!
Focus on blending the edges and creating a uniform density. Patience is crucial – slow, deliberate trimming will yield the best results. Remember, a slightly imperfect pom-pom still possesses charm, but these techniques ensure a polished finish.

Pom Pom Variations
Explore creative pom-pom styles beyond the basic sphere! Chain loop pom-poms offer a unique texture, while adding button loops enables easy interchangeability on hats.
These variations enhance functionality and personalization, transforming simple pom-poms into versatile, customizable accessories for your handmade creations.
Chain Loop Pom Poms
Chain loop pom-poms present a delightful alternative to traditional yarn-wrapped creations, offering a unique textural element to your projects. Instead of wrapping individual strands around the Clover Pom Pom Maker, you construct a continuous chain using crochet or knitting techniques.
This method involves creating a loop of chain stitches, then carefully wrapping it around the maker’s arms. The resulting pom-pom boasts a distinctive, airy appearance, differing significantly from the dense fullness of conventionally made pom-poms.
Many crafters find this technique particularly appealing for its visual interest and the opportunity to experiment with different yarn weights and colors. It’s a fantastic way to add a handcrafted touch and a unique aesthetic to hats, scarves, or other accessories. The looped texture provides a softer, more relaxed feel.
Adding Button Loops for Interchangeability
Enhance the versatility of your Clover Pom Pom creations by incorporating button loops! This clever addition transforms your pom-poms into easily interchangeable accessories for hats, beanies, and other knitwear. Simply create a small loop with yarn, securely attaching it to the base of the finished pom-pom.
Then, sew a corresponding button onto your hat or garment. The loop effortlessly slips over the button, allowing you to quickly swap pom-poms to match outfits, seasons, or simply your mood! This feature is particularly beneficial for children’s hats, simplifying washing and extending the lifespan of both the hat and the pom-pom.
It’s a fun and practical way to personalize your handmade items, offering endless customization options and a touch of playful creativity. This bonus technique adds significant value and functionality to your pom-pom making.

Clover Pom Pom Maker Durability & Care
Clover Pom Pom Makers are remarkably durable, constructed from robust plastic that withstands repeated use for years and hundreds of pom-poms.
Simple cleaning involves wiping away yarn fibers; proper storage ensures longevity, preserving these valuable crafting tools for countless projects.
Longevity of Clover Makers
Clover Pom Pom Makers distinguish themselves through exceptional durability, a key factor for crafters who frequently utilize these tools. Unlike generic alternatives that often fall apart after minimal use, Clover makers are engineered to endure. Many users report owning their Clover Pom Pom Makers for years, consistently producing hundreds of pom-poms without experiencing any breakage or significant wear and tear.
This longevity stems from the quality of the plastic used in their construction – it’s robust yet flexible enough to withstand the repeated opening and closing required during the pom-pom making process. Investing in a Clover maker is, therefore, a cost-effective choice in the long run, eliminating the need for frequent replacements and ensuring a reliable tool for all your fluffy crafting needs. Their resilience truly sets them apart.
Cleaning and Storage
Maintaining your Clover Pom Pom Maker is remarkably simple, ensuring its longevity and continued performance. After each use, it’s advisable to remove any lingering yarn fibers. A quick wipe down with a slightly damp cloth is usually sufficient to remove dust or debris. Avoid using harsh chemicals or abrasive cleaners, as these could potentially damage the plastic.
For storage, a dedicated craft bin or drawer is ideal. Keeping your Clover Pom Pom Makers together prevents loss and makes them readily accessible for your next project. Some crafters prefer to store them in a resealable bag to further protect them from dust and potential scratches. Proper care and storage will guarantee years of reliable service from your valued crafting tool.